

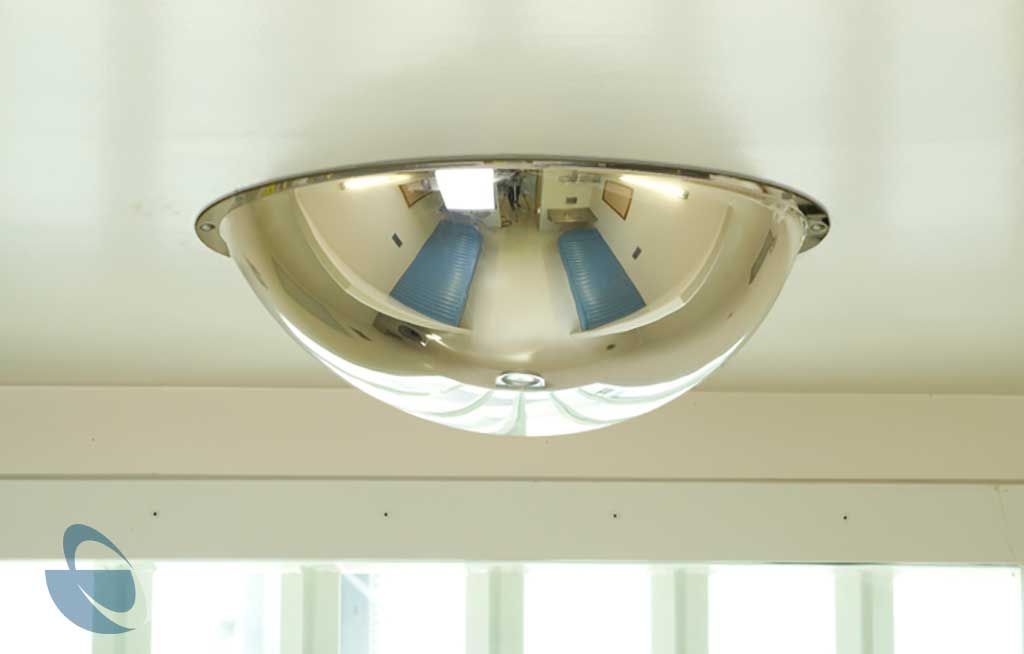

Features
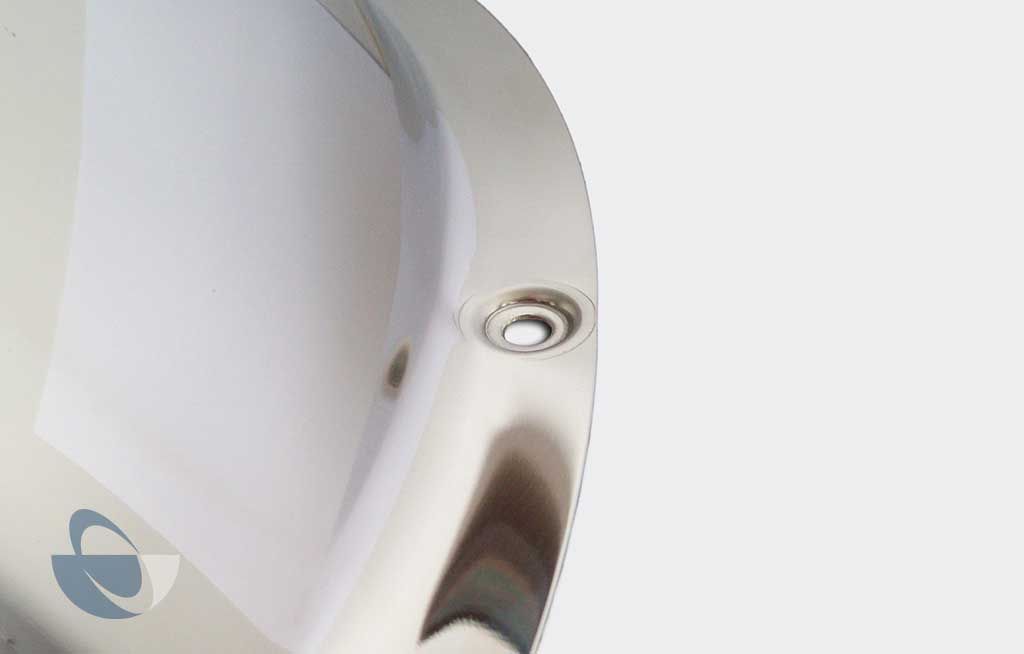
- Virtually indestructible and unbreakable mirror quality polished stainless steel face, designed to maximise the viewing area which will provide added safety
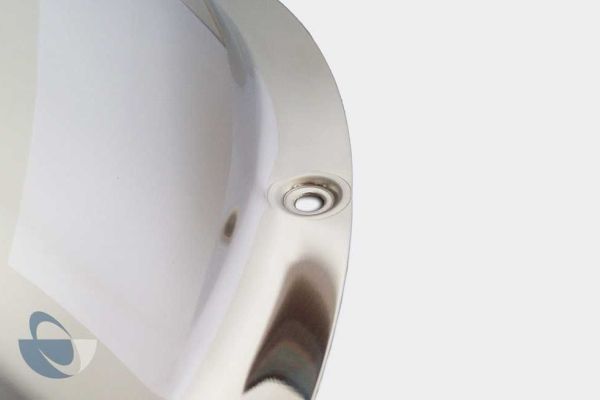
- Counter-bore and Pressed Counter-bore holes designed to take security head fasteners such as Rawl Spikes or Torx Screws
- Available with or without a frame, due to the unique hole design, provides flexibility in low risk areas and cost savings as a result.
- Can be used in conjunction with CCTV to enhance effectiveness & safety
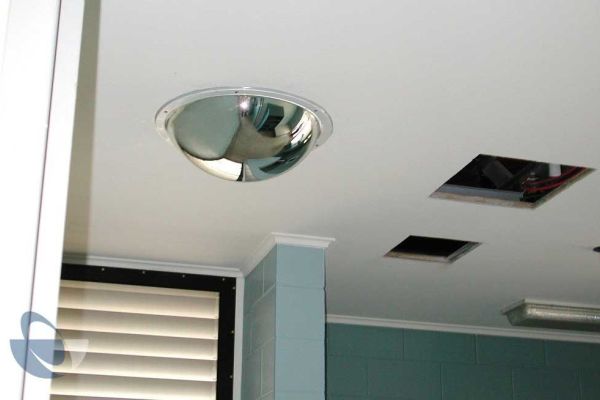
Suitable Uses
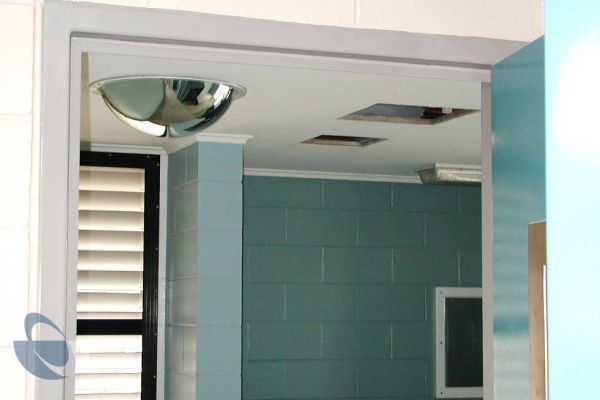
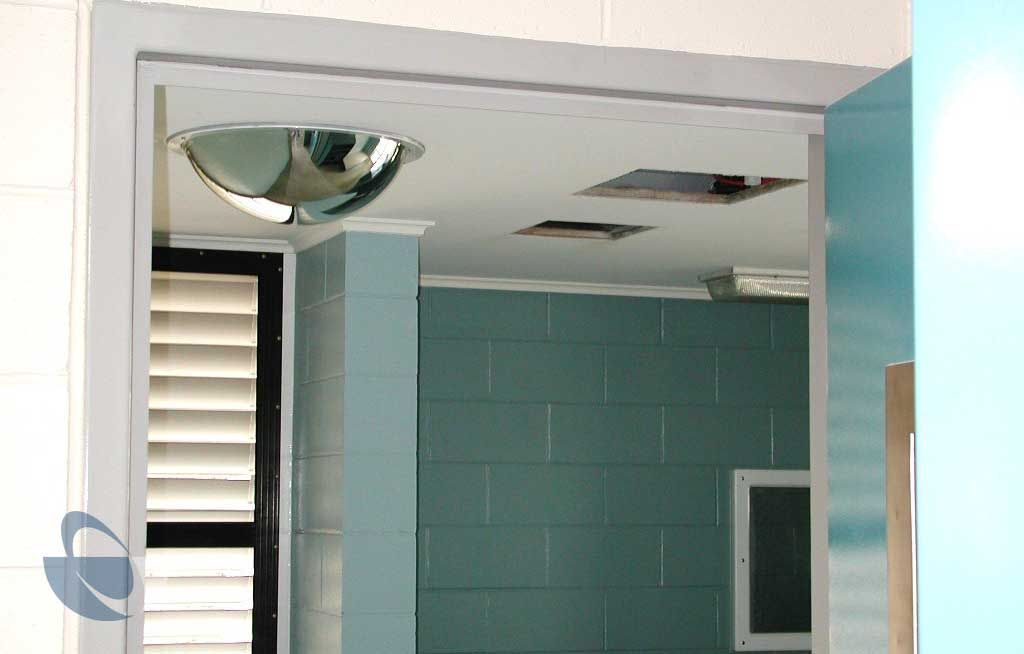
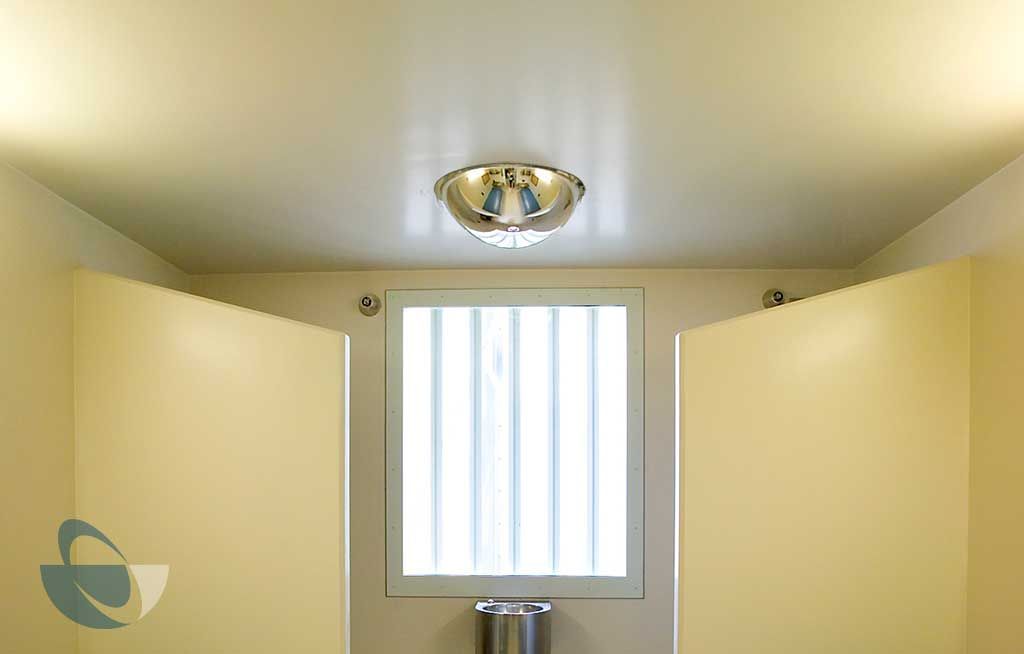
- In prison cells for safe inspection
- Observation of at risk patients in mental healthcare
- Open areas such as visitation rooms
- 4-way intersections in corridors
Specifications
International Product Codes
Specifications:
| Product Code | Size | Mirror Face | View Distance | Fixing Holes | Frame Colour |
|---|---|---|---|---|---|
| 16528HD | 500mm 20" | 1mm Stainless Steel | Up to 5m | 6 | Grey |
| 16528C | 500mm 20" | 1mm Stainless Steel | Up to 5m | 6 | None |
Download PDF Information Guide View
Usage Guides
Positioning
Installation Guide
Stainless Steel Full Dome Mirror and (optional) Frame Installation
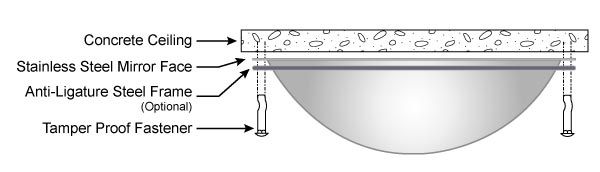
NOTE: Retaining Ring with Counter-Sunk Holes is optional for Stainless Steel Domes.
(ie: Frameless Domes with Counter-Bore Holes can be mounted directly to ceiling with appropriate tamperproof fixings).
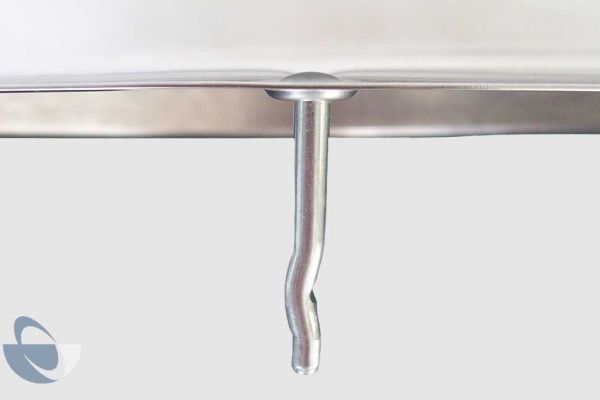
NOTE: If installing with Rawl Spikes, it is recommended to use a punch. This is to eliminate damage to the mirror and/or powder-coated frame (if using).
Suggested Fastening Methods
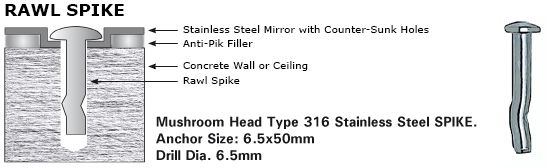
Installation: Drill a hole into the base material to a depth of at least 60mm.The tolerances of the drill bit used should meet the requirements of ISO/DIN Standard 8035. Blow the hole clean of dust and other material. Drive the Spike through the appropriate mirror face hole (and frame when used) ensuring the head is sitting firmly against the mirror or frame and recessed as shown in the above diagram.
NOTE: Care should be taken not to overdrive the Spike so as to cause damage to the powder coated surface of the frame. Finish off by applying (optional) a bead of non-pick sealant around the mirror or frame and the wall to prevent the secretion of small objects (eg razor blades etc).
DuraVision Rawl Spike Punch: The DuraVision designed punch for inserting spikes can significantly reduce the risk of damaging the mirror face and frame during installation.

Installation: It is recommended to use a 3/16” (4.76mm) Straight Shank Tanged Bit to drill the hole. The hole must be at least 2” or 50mm overall depth and free of any debris. By using the #27, 1/4” (6.35mm) Hex Bit the special Hi-Lo thread literally taps into masonry materials. The high,sharp thread with its notched cutting edge cuts deeply and easily. The alternating low thread provides stabilty for fast, accurate driving. Torx Tamperproof masonry screws are the optimal fastening solution for use in concrete, brick, or hollow block.
Download PDF Installation Guide View
Cleaning Guide
Stainless Steel Mirror Cleaning Guide:
General Cleaning:
DuraVision™ recommend cleaning their Stainless Steel Mirrors with soap and water and then with a soft, lint free, damp cloth.
DO NOT USE:
- abrasives
- acids
Polish:
DuraVision™ does not recommend using a commercial Stainless Steel Polish, as the protective layer will leave a residue on the highly polished mirror faces. Rubbing plain white flour on a dry stainless steel mirror face with a dry cloth will polish the mirror to its original brilliance.
Graffiti Removal:
Any graffiti should be removed from the mirror face as soon as possible and preferably within 24 hours with a suitable lacquer thinners. Not all graffiti cleaning agents are suitable. Failure to use an approved cleaning agent may damage the mirror surface.
Optional Powder Coated Frames:
Do not use harsh cleaning products or products that will leave a residue, as this will damage the powder coating which protects the frame.
Download PDF Cleaning Guide View
